Integrate with Zapier
Learn how to publish content using Zapier with 3rd party applications
Integrating Writesonic with Zapier allows users to automate various tasks, boosting productivity and efficiency. With this integration, you can connect Writesonic with numerous other applications to automate document creation and updates, manage spreadsheet data, streamline email responses, and synchronize notes and tasks across platforms. This no-code solution simplifies the setup and management of integrations, ensuring seamless collaboration between your tools without manual intervention.
Benefits of Integrating Writesonic with Zapier
- Automate Repetitive Tasks: Save time by automating tasks like posting content, managing spreadsheets, and more.
- Enhance Productivity: Keep multiple tools in sync without manual intervention, boosting overall productivity .
- No Coding Required: Easily set up and manage integrations without writing a single line of code.
Popular Integrations
- Google Docs: Automate document creation and updates.
- WordPress: Seamlessly publish AI-generated content to your website.
- Google Sheets: Manage data and content in spreadsheets.
- Gmail: Automate email responses and management.
Step 1 - Create a Writesonic API for Zapier
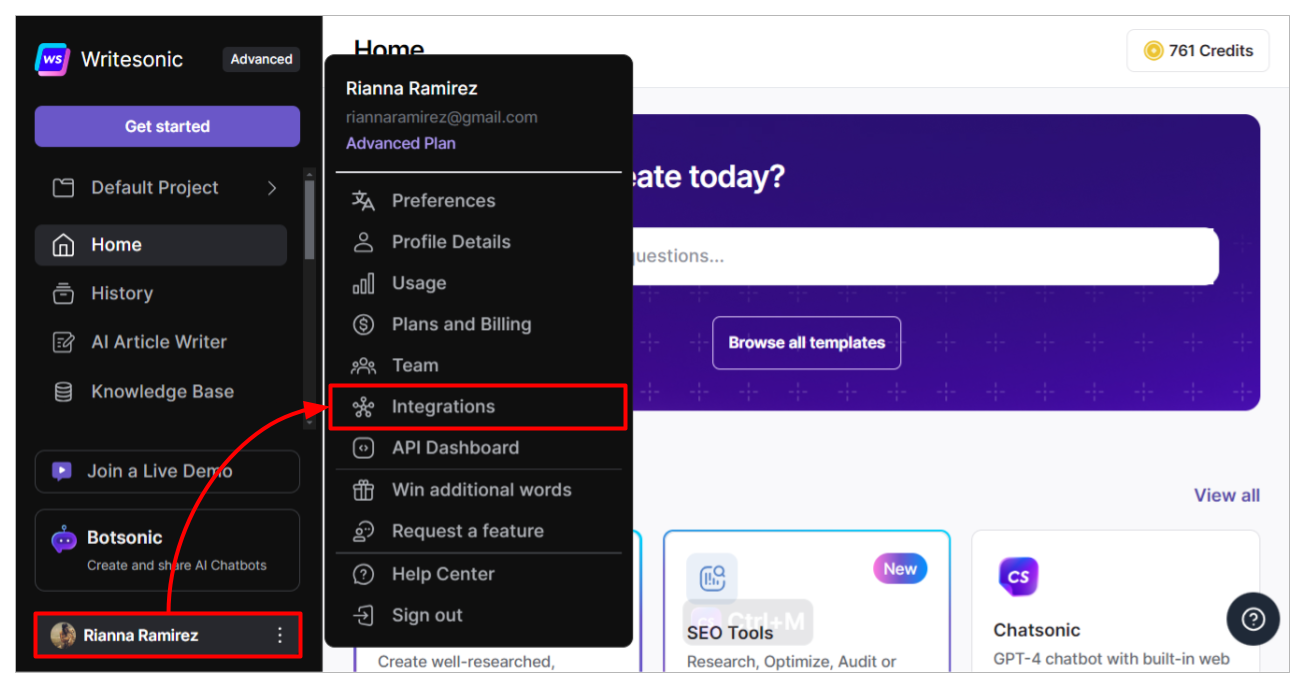
- In your Writesonic dashboard, click on your avatar located on the bottom left corner of the page, then select [Integrations]
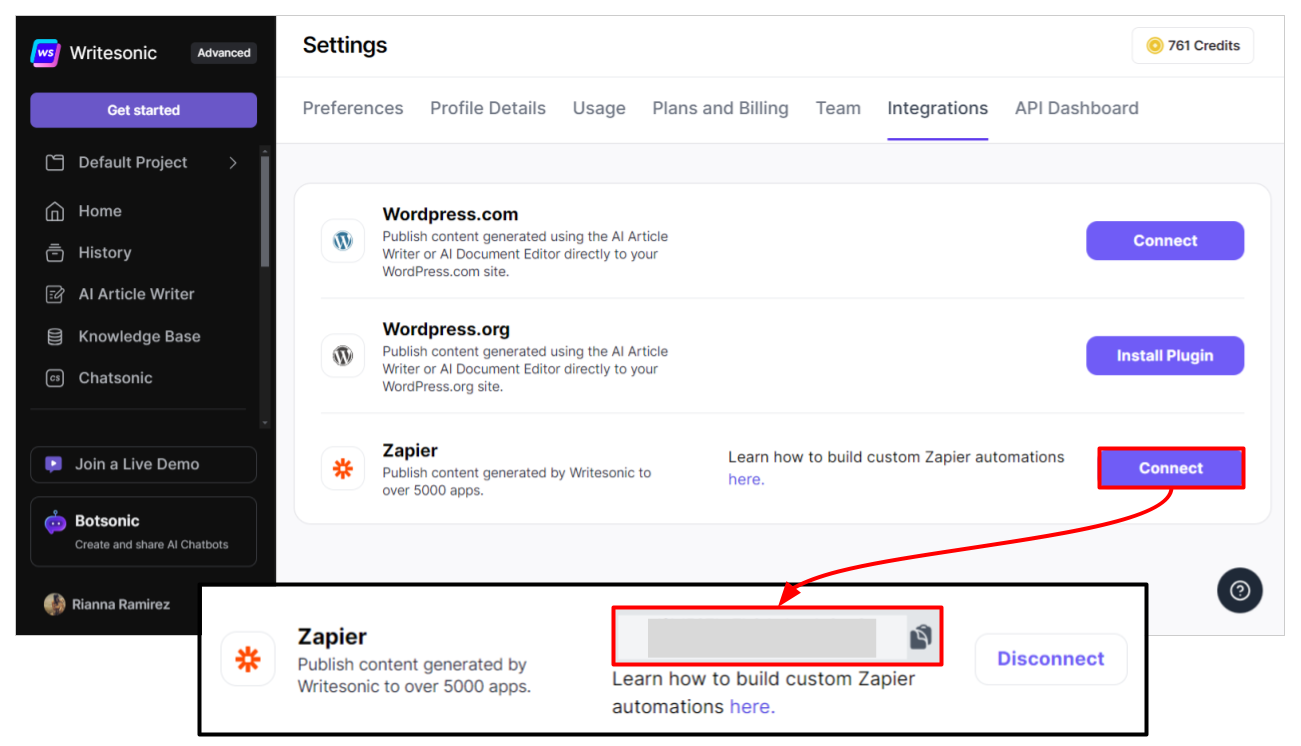
- On the integrations tab, find Zapier and click on the [connect] button. This will generate an API key that you need to copy.
Step 2 - Create a Zap
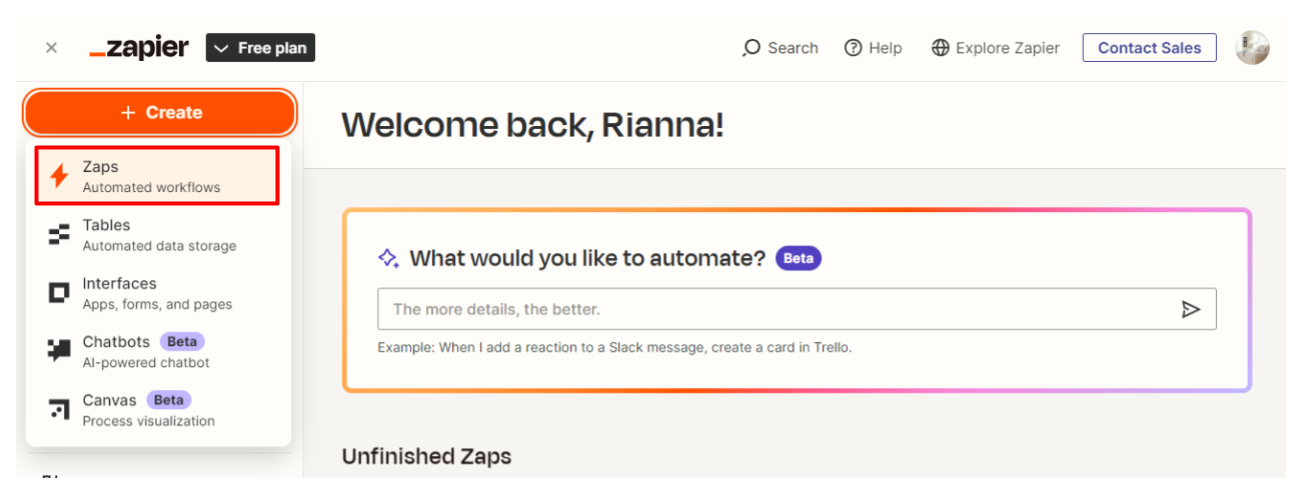
- Log into your Zapier account.
- Click [Create], then select [Zaps]
Set Up Trigger
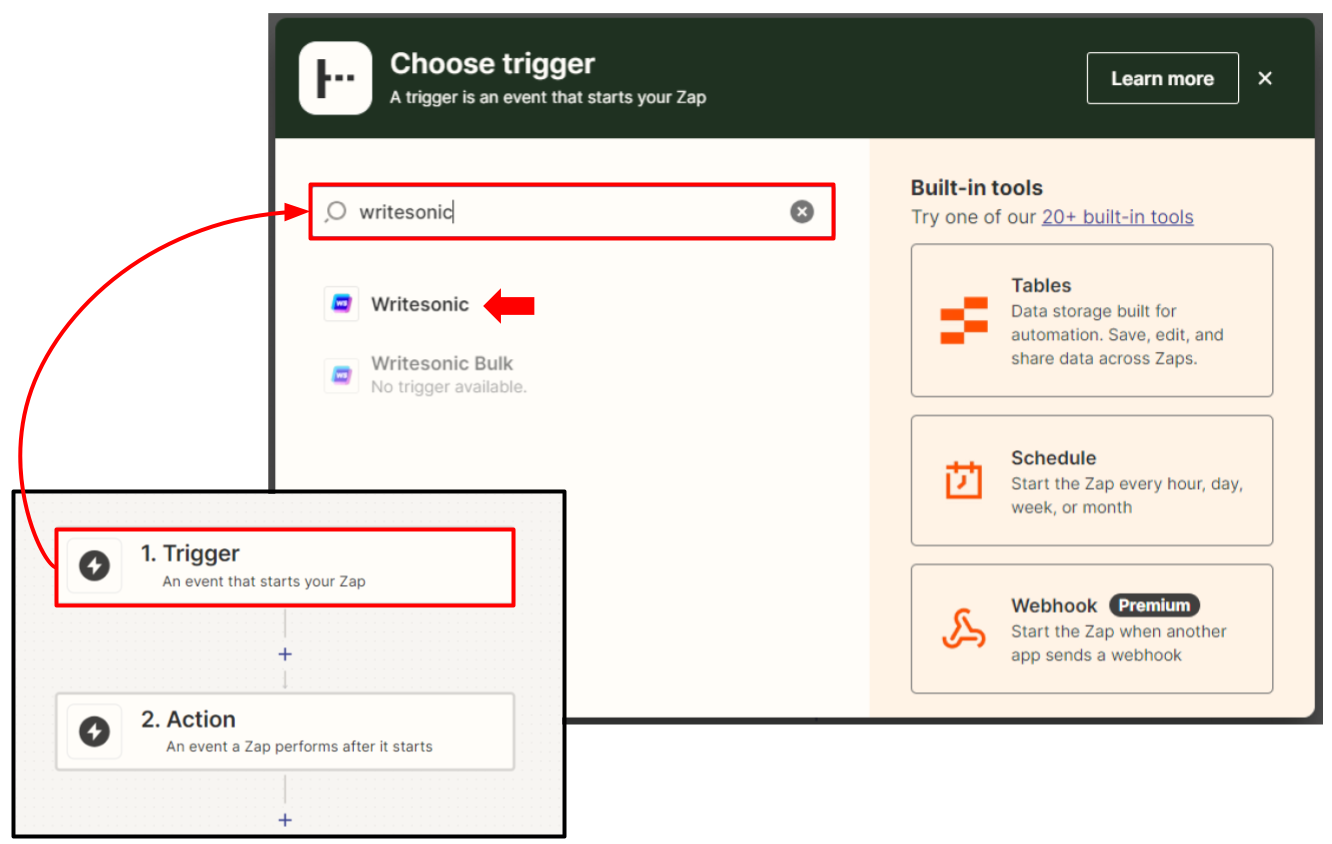
- Click [Trigger], then search for "Writesonic" and select it.
- Select [New Copy Published] as an [Event], then click [continue]
- Sign in with your Writesonic account
- Enter the API key you generated earlier, then click [yes, continue to Writesonic]
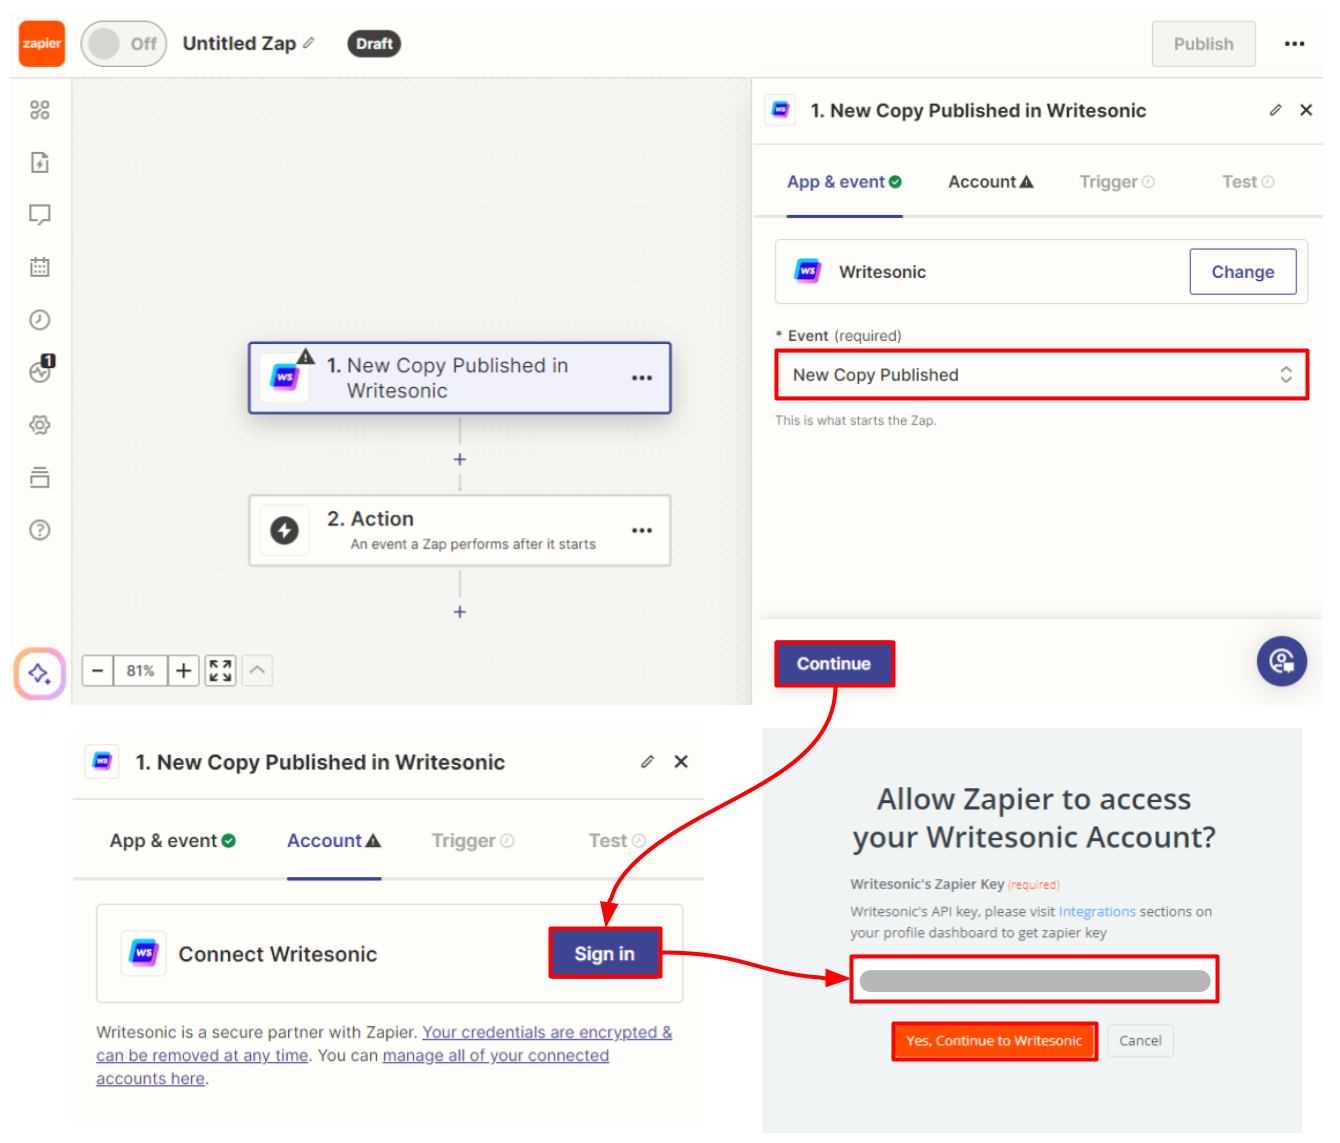
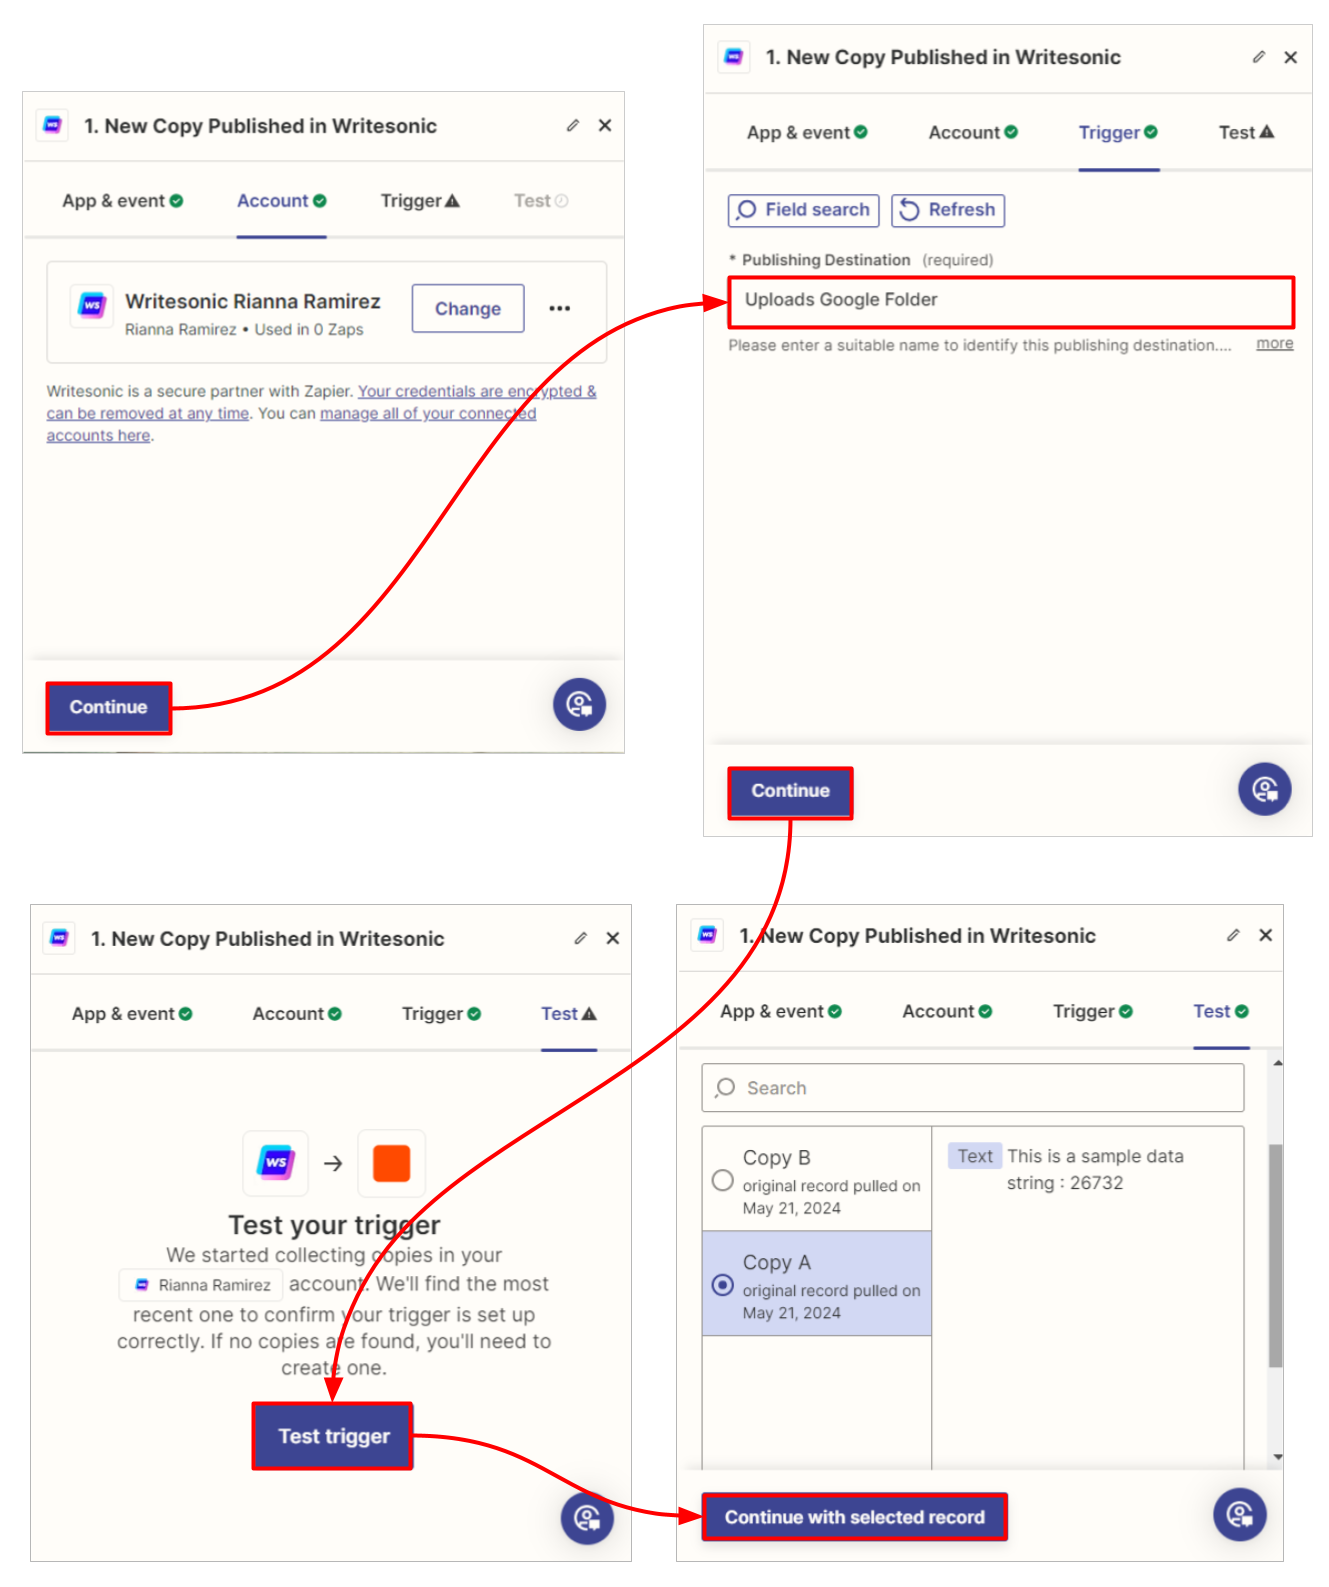
- Fill out the "Publishing Destination" Field. Enter a suitable name to identify the publishing destination of your Writesonic document (eg. Uploads Google Folder), then click [continue]
- Click [Test Trigger], Zapier will create a test record. Select it, then click [Continue with test record]
Set Up Action
- Click [Action], then search for an application then select it. For the example below, we've selected "Google Docs" as an "action." Note: The specifics of the next steps will differ depending on the action you've selected, but the flow will be the same.
- Sign into your Google account
- Select [Create New Document as Text] as an [Event], then click [continue]
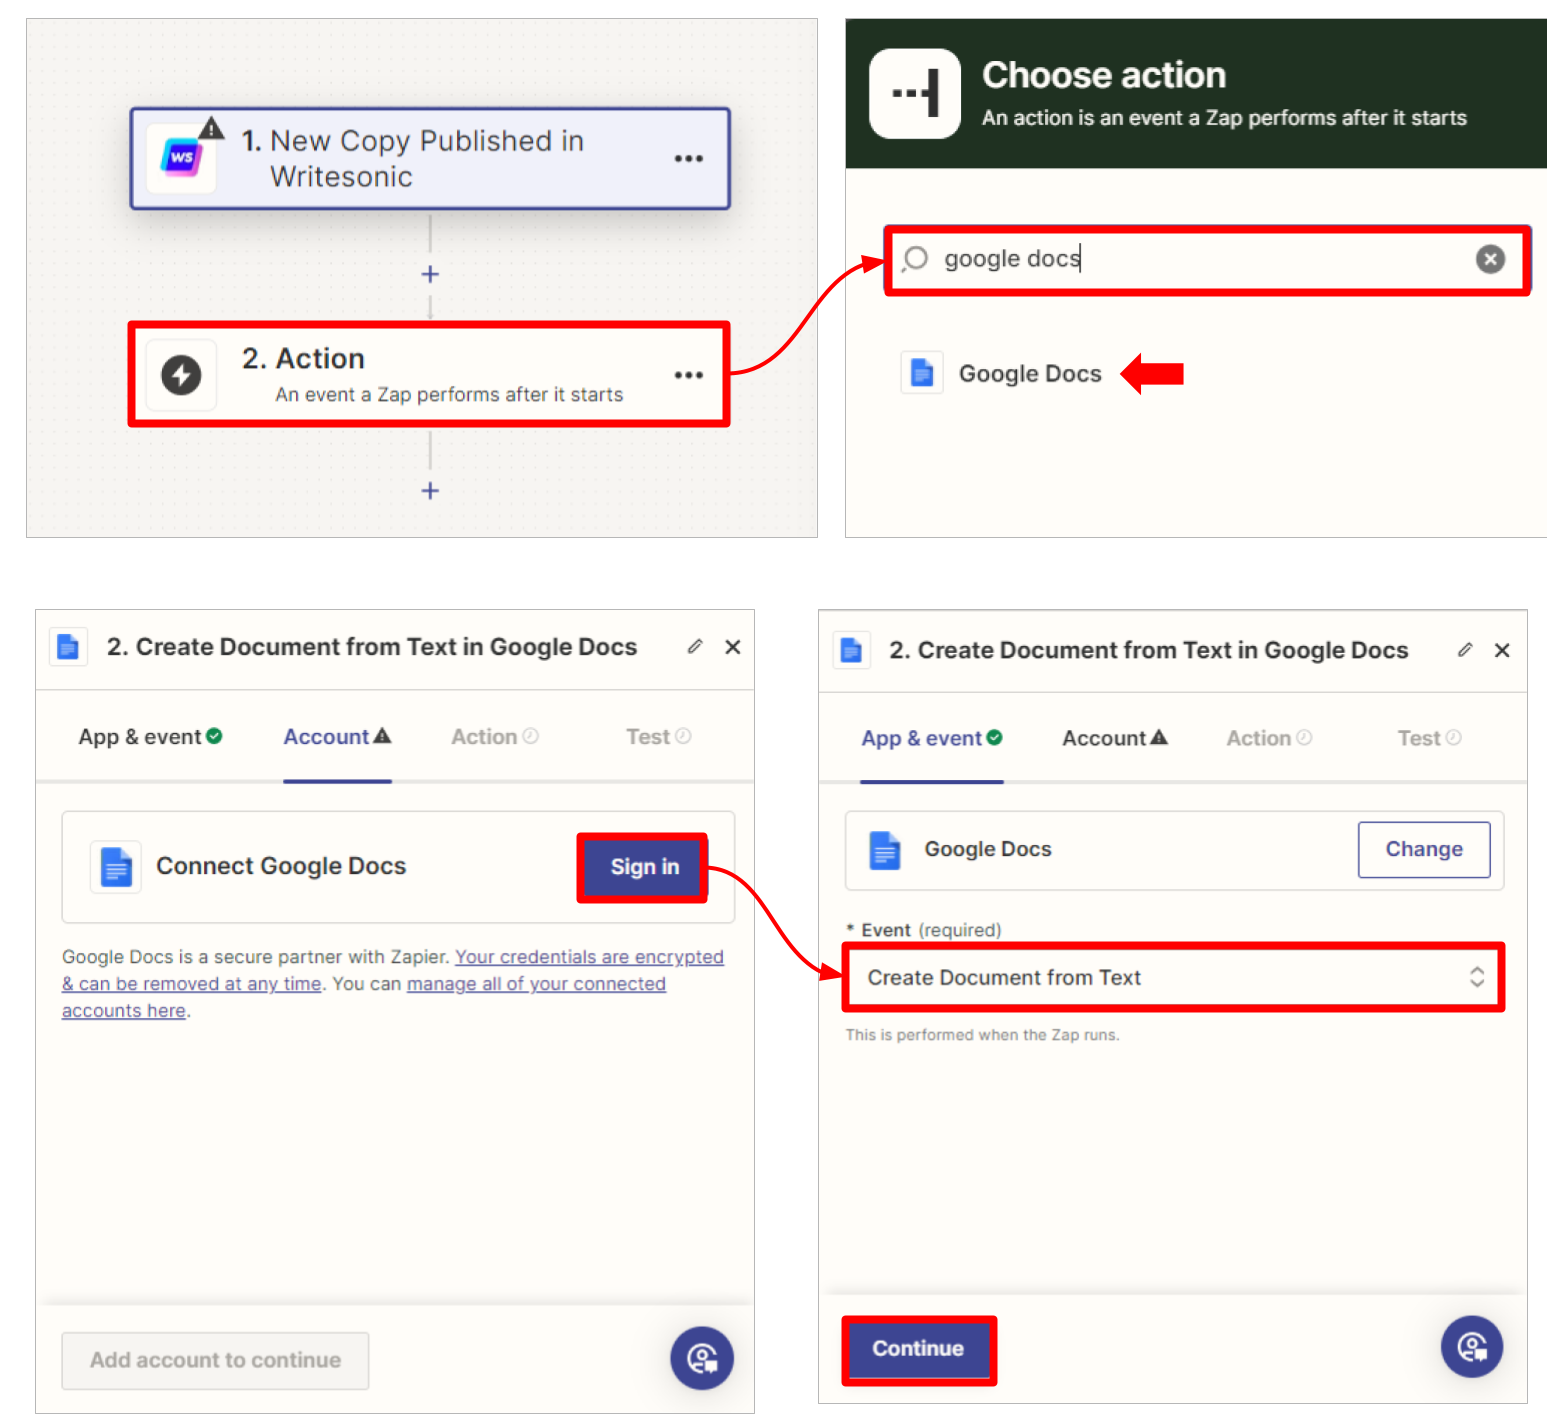
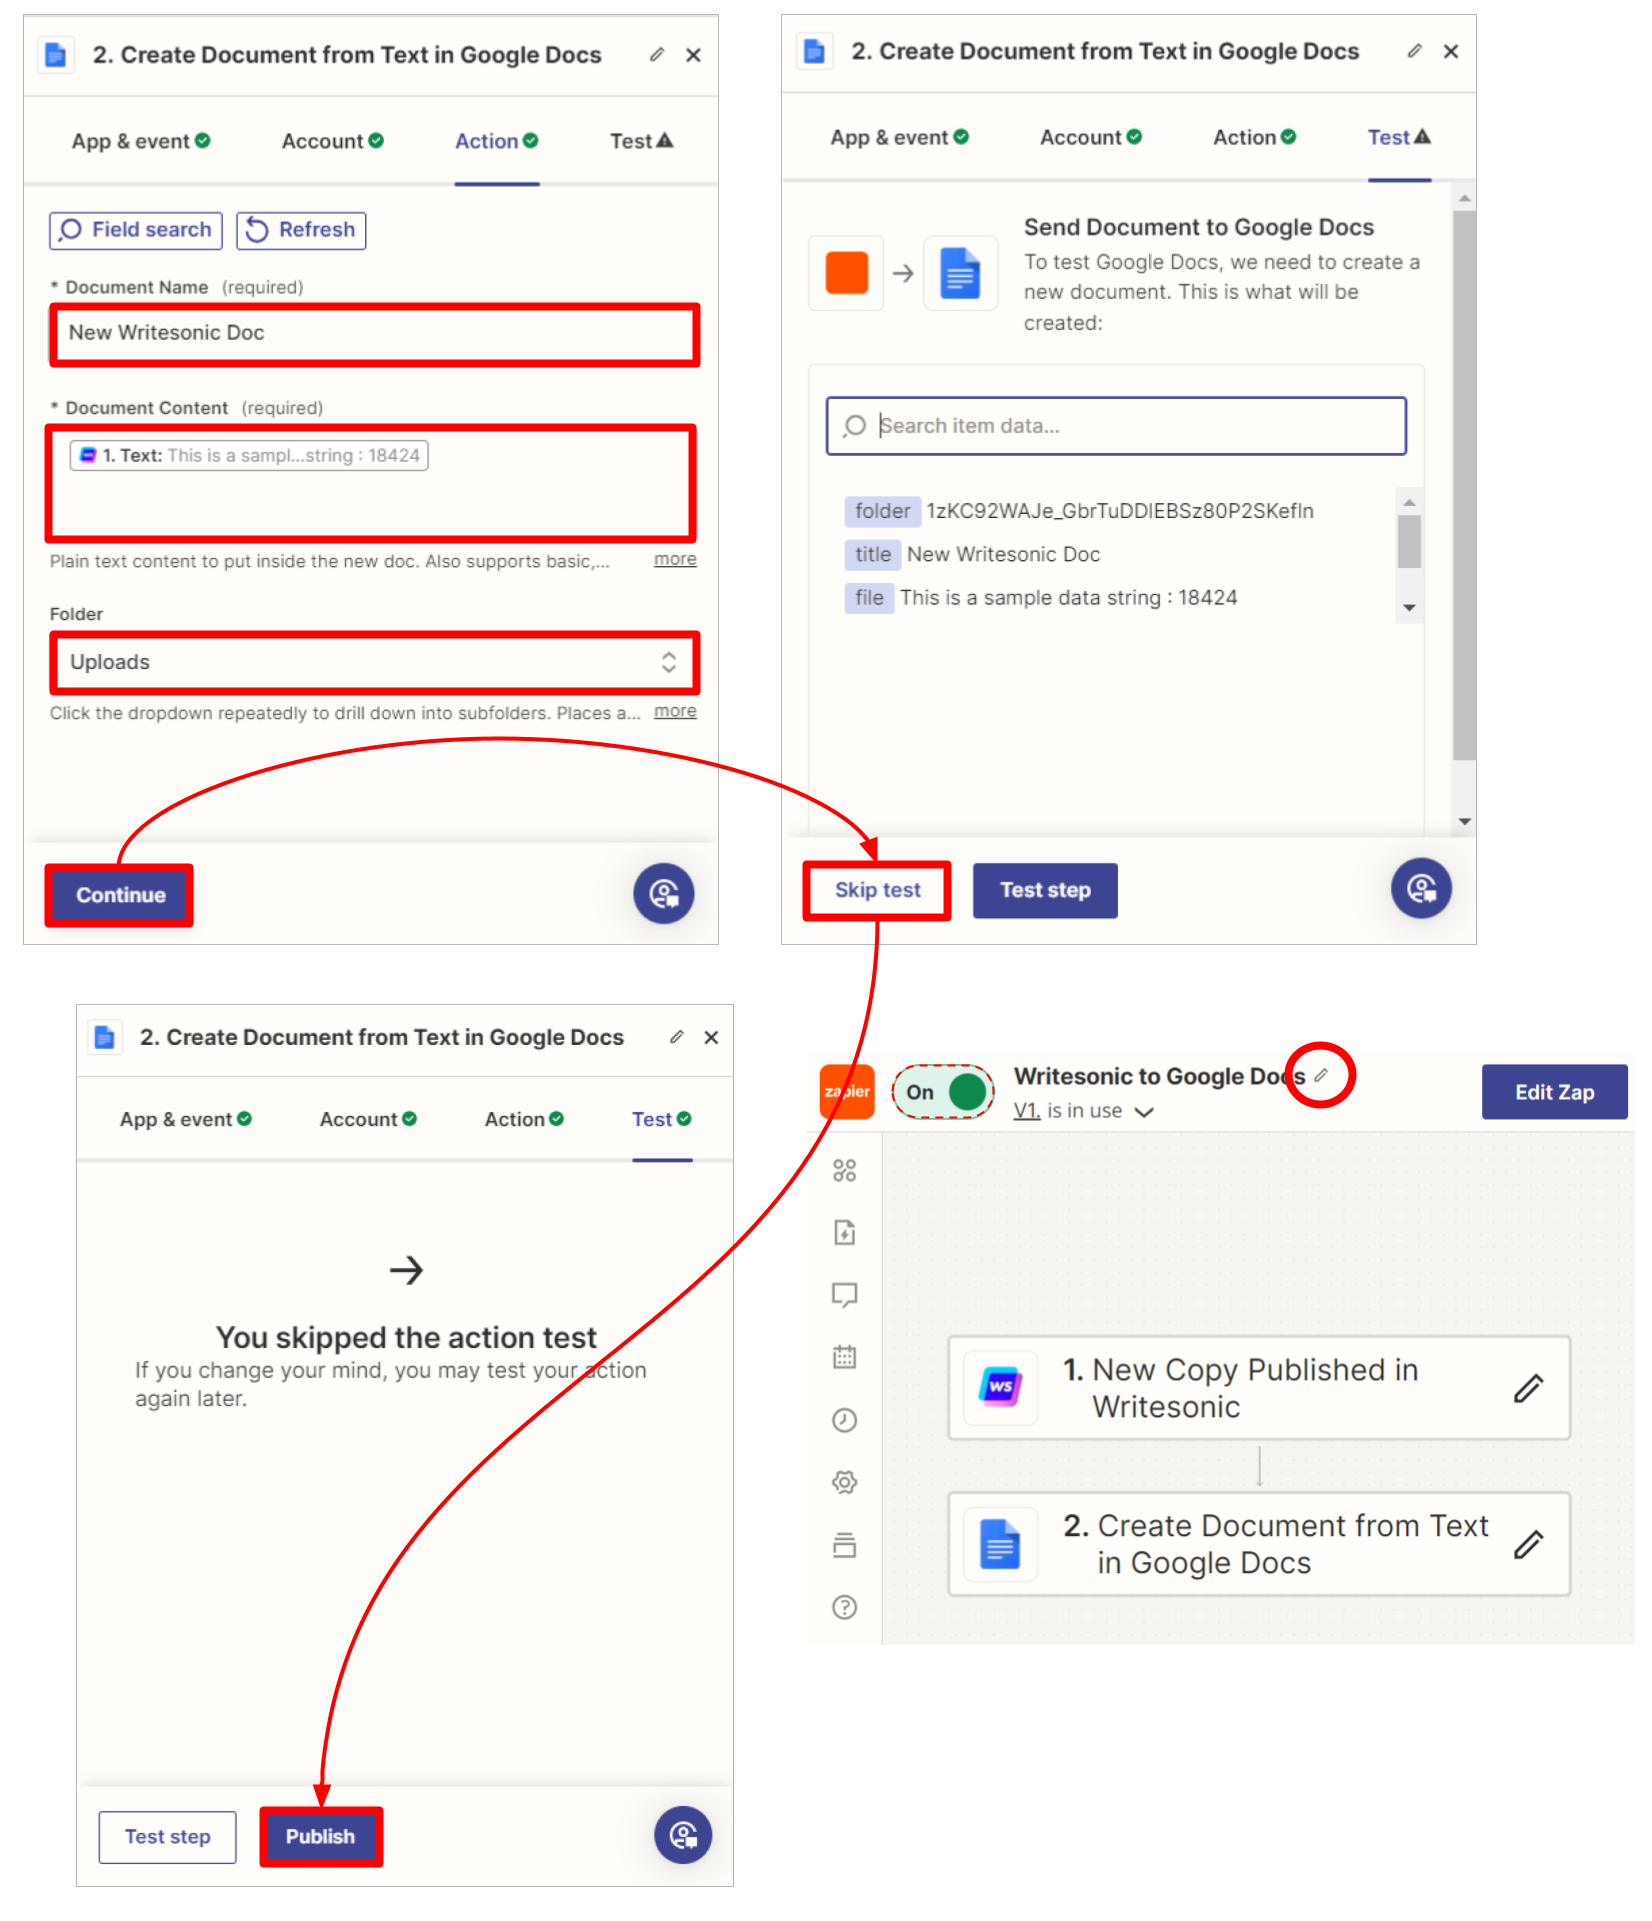
- Complete the following fields, then click [continue]
- Documet Name - this will be the title of the google doc when the content is published and saved as a google doc in the folder you've selected.
- Document Content - select the [sample text field]
- Google Folder - select a Google folder where you want the document to be saved
- Click [Skip test]
- Click [Publish]. Don't forget to give your Zap a name.
Step 3 - Publish your Writesonic document
- In your Writesonic account, open the document you'd like to publish to Zapier
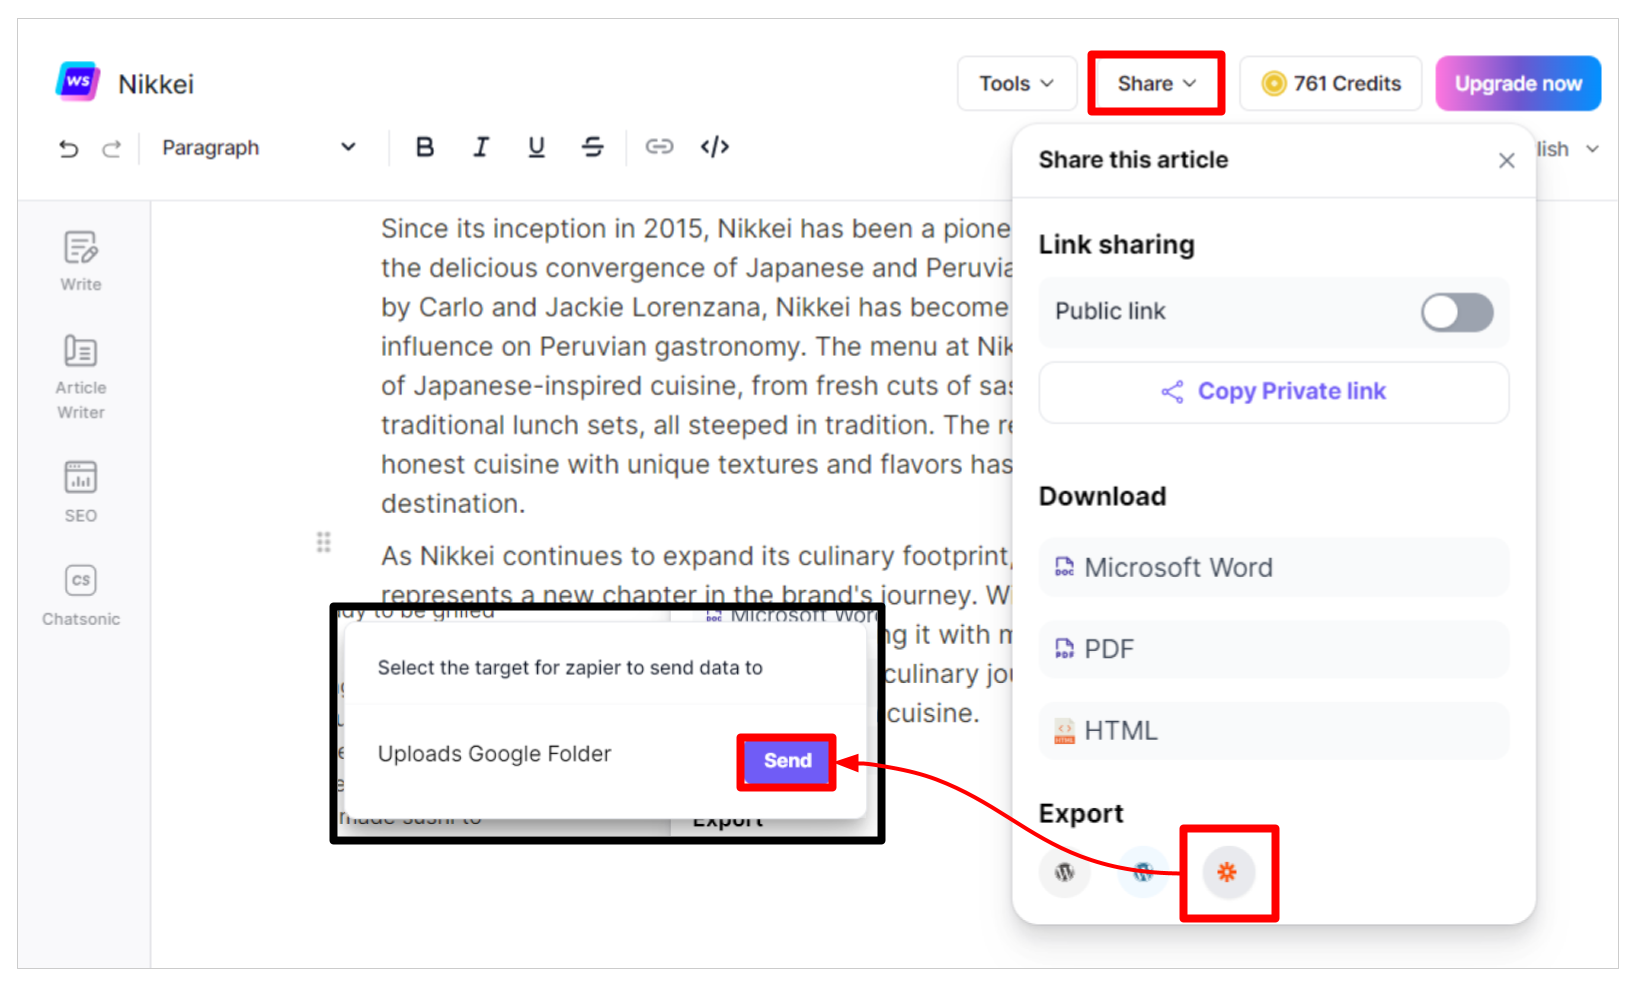
- Click the [Share] button located at the top right section of the AI Content Editor
- On the "Export" section of the share menu, select the [Zapier] icon
- Then click the [Send] button where you'd like to publish the document.
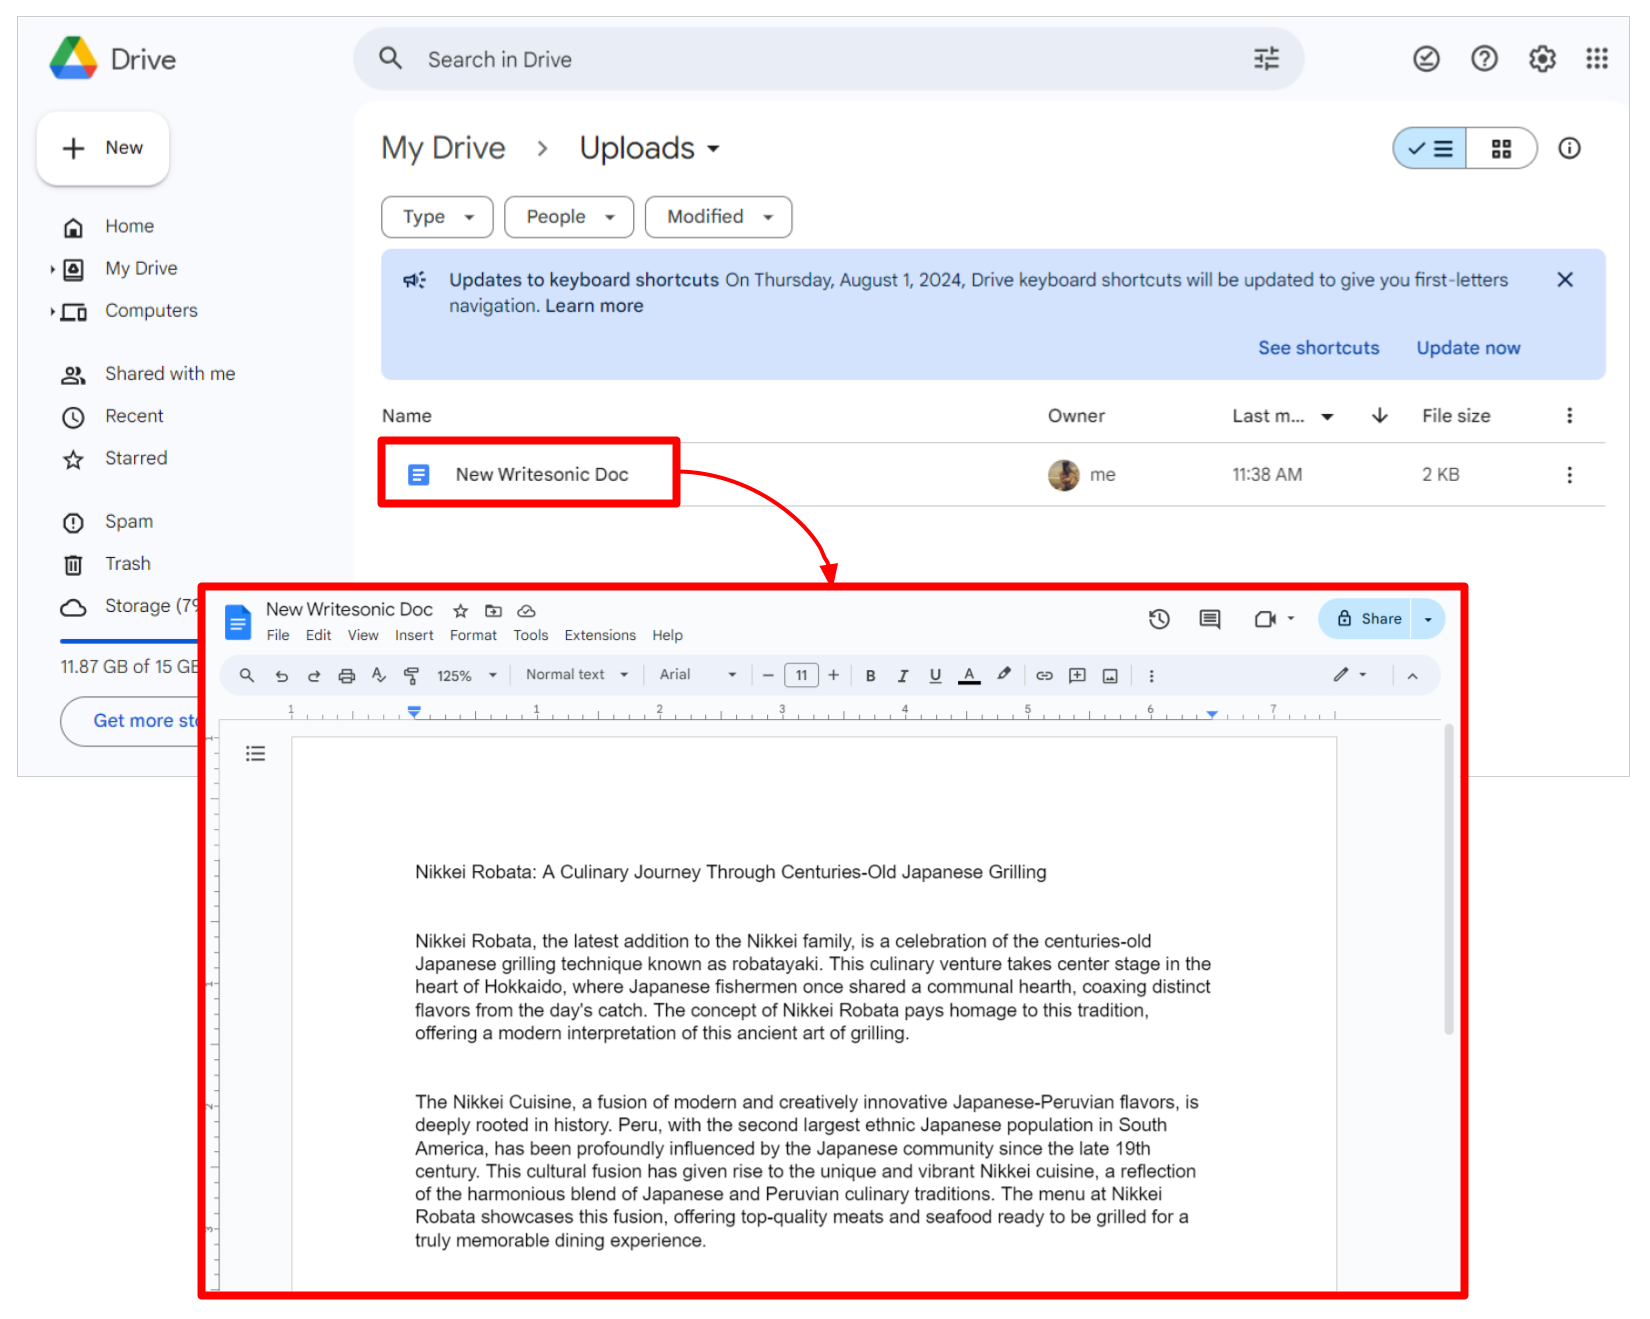
- Go to the destination you've selected. In this example, we used Google Docs to publish the document. Go to the Google Docs folder and open the document containing the title you've assigned during the "Setup Action" process
- Confirm that the content matches the content in your Writesonic account.
Updated over 1 year ago
Did this page help you?